
Now we’re going to give you some instructions on how to record really good audio even if you don’t have fancy equipment. We want you to have the chance to be creative and express yourself. Following these guidelines will make sure that your recordings sound really good, all of your thoughts, ideas, and creativity can be heard loudly and clearly. The instructions below are aimed at people recording using a phone. If you’re using something other than a phone (e.g. a digital recorder) search online for instructions on how to record using the particular type of device you have.
Downloading an app
If you’re recording on a phone, you should download a good recording app. One of the best free recording apps is Voice Record Pro, which is available for Android Phones and for iPhones. Download it from your app store as you would download any other app.
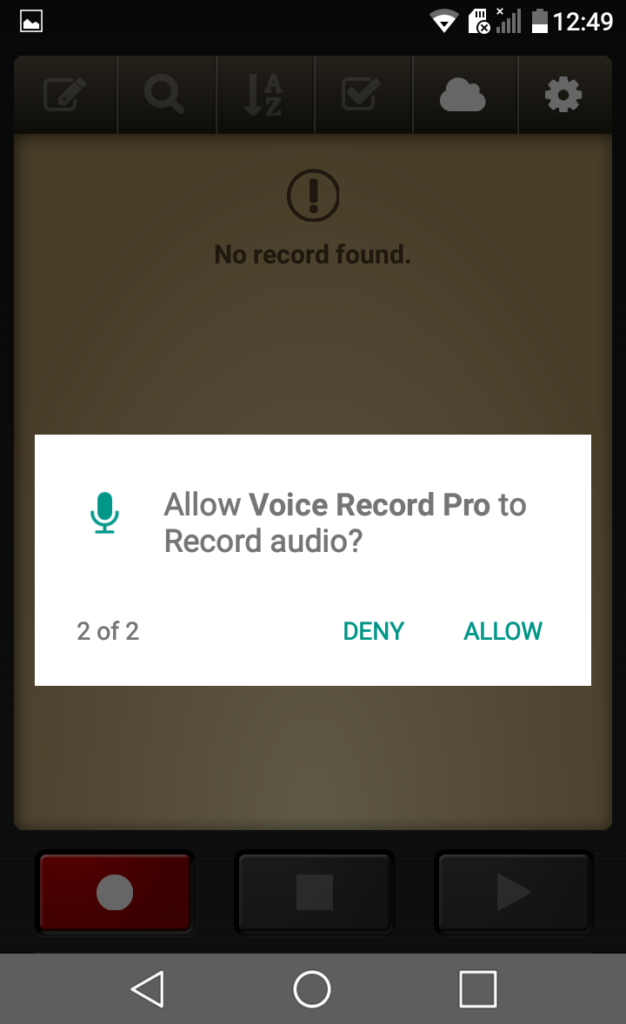
While you’re installing Voice Record Pro, you’ll be prompted to give the app permission to record and save files on your phone. You need to click ‘allow’, or it won’t work properly.

Testing your app
Before you start recording properly, do a test run: press the red Record button at the bottom of the screen to start recording. You’ll be taken to the Recording Settings page, but there’s no need to change any of the settings right now (the default settings will work fine): just press the red Record button again to start recording. Say something or make some kind of noise, and press the square Stop button at the bottom of the screen when you’re finished. You can then press the blue Play button to listen back to your recording, to check that it worked.
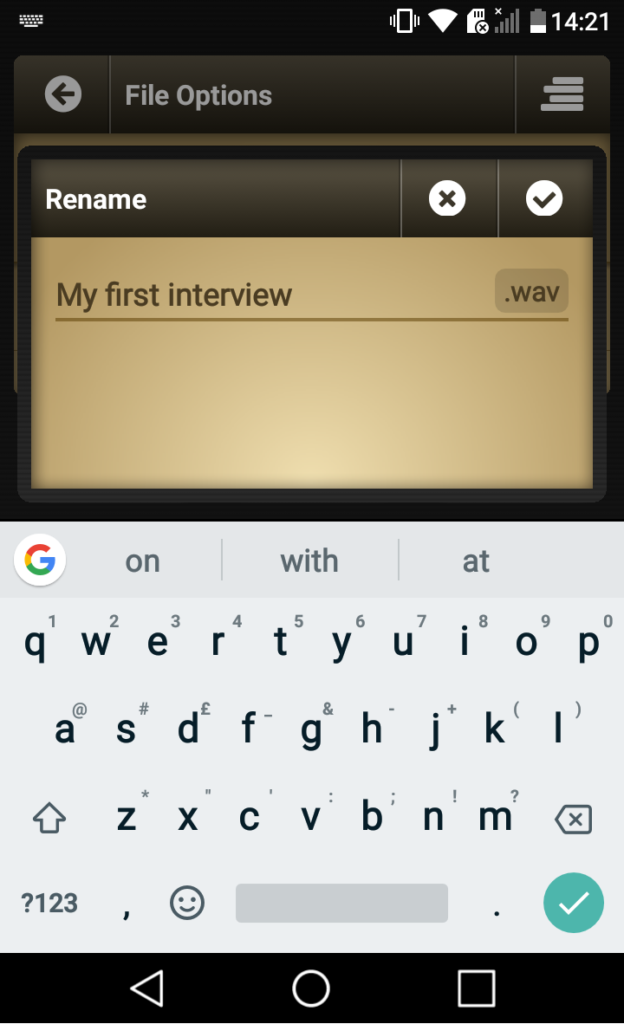
When you’ve finished recording, you’ll see a new File Options menu. Select Rename and name your file something like ‘Test’.
Once you’ve renamed the file, you should see it in the Home menu. Click on it, and try sending it by email or exporting it to Google Drive, Dropbox, or OneDrive.
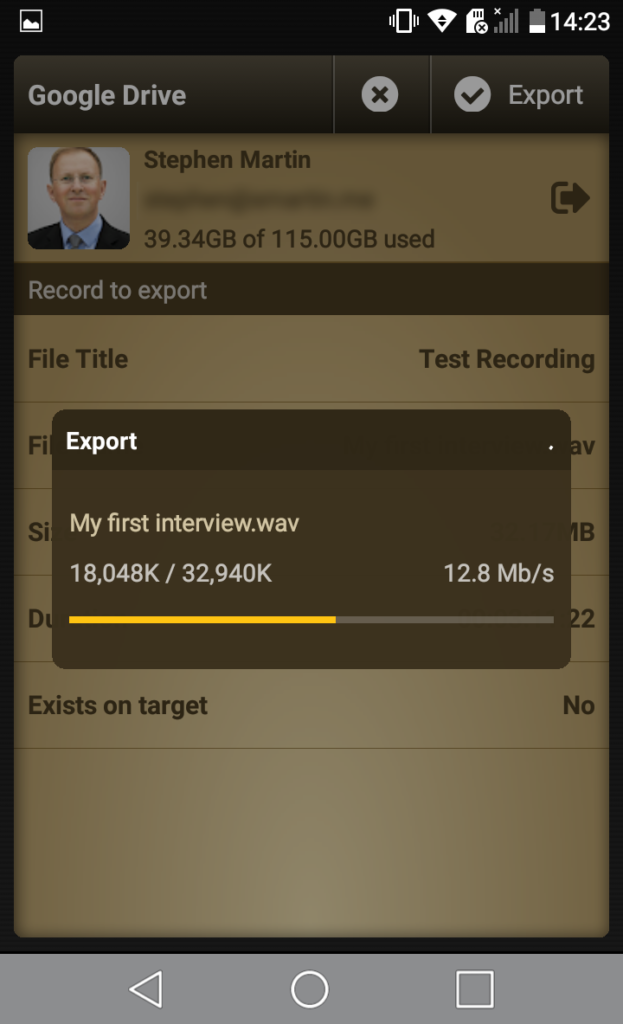

Wait a little while for the file to transfer, and then check that the transfer has worked. If you are exporting to Google Drive, Dropbox or OneDrive, a folder should appear in your drive, called something like ‘Voice Record Pro’. Your test recording should appear in this folder.
Prepare your phone for recordings
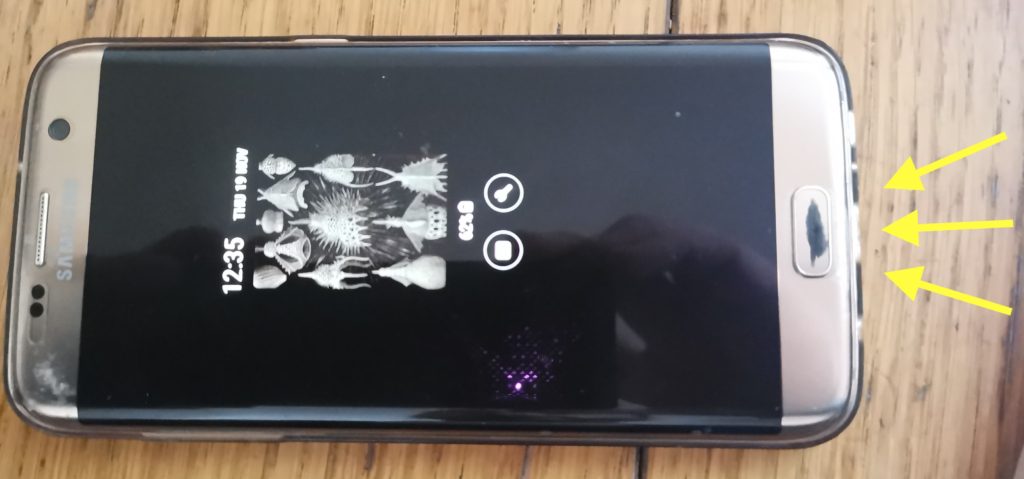
Make sure that your recording won’t be interrupted: check your battery level (it should be at least 50% when you begin recording), and switch off any notifications that make noise or vibrate your device (depending on the type of phone you have, you might have a ‘do not disturb mode’, or you might like to temporarily put your phone into ‘flight mode’).
Finding your microphone
If you’re recording on a phone, the microphone or microphones are probably in the bottom of your phone, where you would normally speak into on a phone call.
Some phones also have a microphone on the other end. If you want to test where your microphones are, you can start recording, and then tap the places on the phone where you think the microphones might be. Voice Record Pro shows a gauge when you’re recording, which tells you what your recording level is. When you tap a microphone, the needle on the gauge will respond.
Microphone Placement
Don’t just record with your phone sitting on the table in front of you: it won’t pick up your voice very well this way.

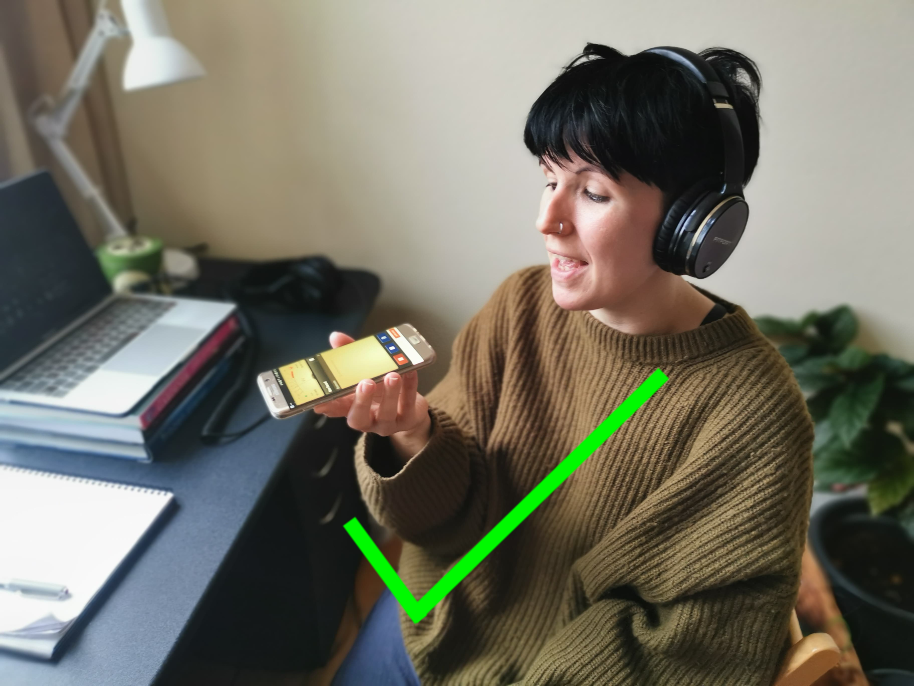
Instead, point the microphone towards the speaker’s mouth. Try holding it with your arm in by your and your elbow bent to a 45-degree angle, pointing the bottom end to your mouth. The microphone also needs to be just the right distance from the speaker’s mouth: not too close, not too far away. The distance in the picture below is probably about right (approximately 15cm).
If your mouth is too close to the microphone, the audio quality won’t sound very good: you might get distortion (where your voice starts to blur and crackle and sound really bad).
In Voice Record Pro, you can use your gauge to help you get the distance right (most good apps and and recording devices will have some kind of gauge showing recording level). If the needle on the gauge is close to the red area, move the microphone away from your mouth a little bit.
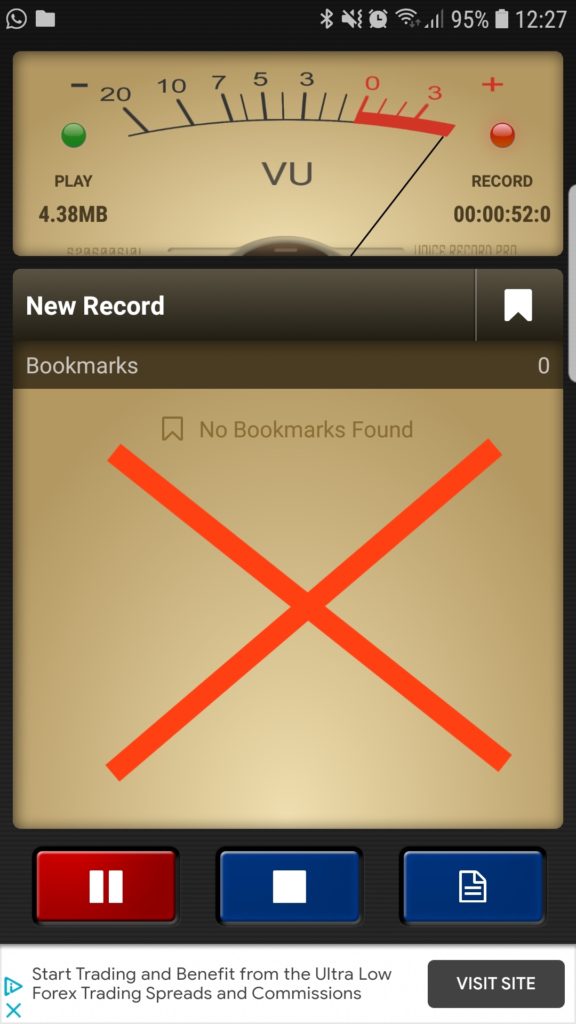
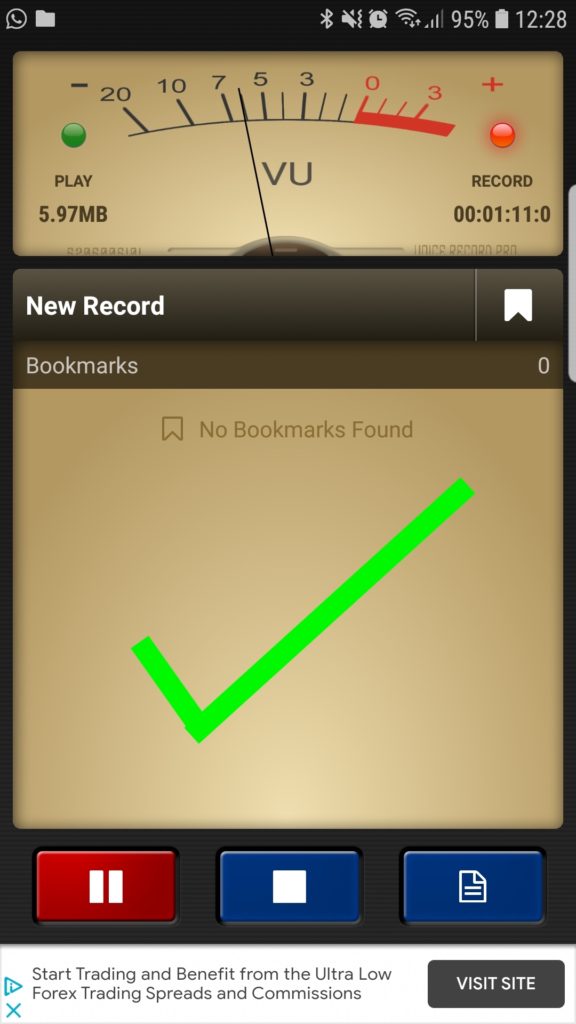
The image on the right shows roughly where you want the gauge to be while you’re recording voices.
Your phone will also have volume controls, but these only alter the volume of your phone’s output, they don’t do adjust the sensitivity of your microphone, so they’re not much use to us right now. Instead, focus on getting the distance between your mouth and the microphone right.
Background Noise
Any time you are about to start recording, stop and listen to the place you’re in. Do cars go past often? It is windy? Is there a washing machine running nearby? If you are in a place with lots of background noise, you might be better to find somewhere quieter, if possible.
If you can’t avoid background noise, have your mouth a little bit closer to the microphone than you normally would (a little bit closer than in the pictures above).
Are you wearing jewellery that jangles and make a noise, like bracelets or earrings? If so, this might cause its own background noise! If you can, take it off before you start recording.
Using a sponge as a microphone shield
There are a few other things that can had reduce the quality of our audio: when we record outdoors, even a little bit of wind can blow into the microphone and cause distortion. When we speak into the microphone, our breath can do the same. And sometimes when we make certain sounds, like ‘p’ it causes a popping sound on the recording.
We can reduce all of these problems using a microphone shield. Professional audio producers buy these specially made, but you can make your own by covering the microphone on your phone with a thin piece of sponge.
All you need is an ordinary kitchen sponge, like the kind you would use to clean the dishes, and a rubber band.
Cut the sponge lengthways and discard the harder scouring-pad section if it has one, so that you’re left with just a fairly thin piece of soft sponge.
Next, use the elastic band to secure the sponge over your phone’s microphone (if you have more than one microphone, you can repeat this for the other one). You now have a microphone shield!
It’s also important that while you’re recording you don’t accidentally touch the microphone with your hand this can make a horrible sound on your recording. But if you use the sponge technique demonstrated above then this should prevent that from happening! Also (and this one sounds really basic, but everyone who records audio has made this mistake at least once), always remember to press the record button!
Types of recording
Click below to see tips for making particular types of recordings…
Recording a Monologue
We’d like one of your recordings to be a monologue, where you record your own thoughts and ideas by speaking into your phone directly.
There are two main ways to do this: scripted or unscripted. You can write down what you want to say and then read it, or you can just plan it out in your head and then speak without writing anything down.
The advantage of having a script is that it can help you organise your ideas and think carefully about what you’re going to say, and it might help you get right to the points you want to make. The disadvantage, though, is that reading a script can make your delivery sound a bit boring and flat.
There is an in-between option, which is to write a series of numbers or bullet points, something like this:
- Talk about words I use that mum and dad don’t use
- Talk about words granny uses that mum and dad don’t use
- Talk about how granny pronounces some words differently from how mum pronounces them
Writing bullet points can help keep your thoughts organised, but also allows you to express yourself more freely and conversationally.
Writing bullet points can help keep your thoughts organised, but also allows you to express yourself more freely and conversationally.
Work towards getting to the point where your monologue-voice sounds like your conversation-voice: someone listening to your recording should feel like you’re speaking to them, rather than reading to them.
It’s often good to have a few tries at making each recording, because on your second and third attempts you’ll feel more relaxed and sound more natural. Don’t worry too much about getting it right the first time: if you make a mistake, you can just start a new recording and try again.
Remember to give each file a name when you stop recording: something like this:
Language in Oldham monologue take 1.mp3
Language in Oldham monologue take 2.mp3
Language in Oldham monologue take 3.mp3
This will help you keep your recordings organised, and keep track of which is your final attempt.
Interviewing
Another type of recording you might like to make is an interview. This is where you speak to another person, and ask them questions about their ideas and experiences.
Getting Consent
Before you interview anyone, you will need to get informed consent. This just means that explain what you’re going to do and they agree to be part of it. Make sure you tell them who’s going to hear your podcast (e.g. your class and your teacher), and if it’s going to be shared anywhere publicly.
Planning your Interview
Before you do your interview, think about the questions you want to ask this person. Why are you interviewing them? What can they tell you that you don’t already know? If you’re interviewing your parents about the area you live in, it doesn’t make much sense to ask them how many people live in the area: you could easily look that up online. It might be better to ask them how they feel about the area, or what the area was like when they were younger, before you were born.
Think about how you want to structure your interview. Do you want to start by talking about their first memories from when they were younger, and move on to talking about the present day (this is called a chronological structure)? Do you want to start very simply and then dig deeper, moving onto more difficult or complicated questions?
Make your questions personal. Ask them about their feelings and memories and experiences. Ask them questions that no one else can answer. Remember that your questions don’t need to be difficult questions: sometimes the simplest questions get the most interesting answers. Questions like ‘how does it feel when you speak Polish?’ can give you answers you never would have expected.
It can help to write down your questions in advance, but you don’t need to stick to them rigidly. They might say something you didn’t expect, which leads you to ask another question that you hadn’t thought of before. An interview is really just a structured conversation – and having a conversation means listening, as well as speaking.
We don’t recommend trying to interview multiple people at once – this is really hard! If you want to interview lots of people, that’s great, but speak to them one at a time – it will make your life much easier. Try to arrange a time when your interviewee can be on their own, so that the interview is just between the two of you, with no one else trying to join in the conversation.
Interviewing in Person
Sit close to your interviewee and hold your phone or recording device between you.
If you’re using a phone or recording device with just one microphone (this includes most phones), you’ll need to turn it between yourself and the interviewee so that it records both of your voices. As far as possible, the microphone should always be pointing towards the person who is speaking. When you’re asking a question, it should be pointing towards your mouth. When you’ve finished your question, quickly turn it to face the other person’s mouth so that you can catch their answer.
Position the phone so that you can see the screen while your interviewee is speaking – this means that you can keep an eye on the gauge to see that their level looks OK.
Interviewing Online
Speak to the person you want to interview beforehand and arrange a time for the interview that suits them. Also encourage them to find a quiet place to do the interview in, without too much background noise.
There are different ways to record interviews online. Below are three methods: but unfortunately, some only work on certain devices! We recommend trying out Methods 1 and 2 first. If they don’t work for you, just go to Method 3. Test these methods out before you arrange an interview with your interviewee, so that by the time you speak to them, you know which method you’re planning to use.
If you are just doing the Recording part, then you have now finished the tutorial! Please click on the ‘Final Step’ button below. If you are going on to do the editing section, click below to continue.